‘hood Magazine is an Amazon Associate and earns from qualifying purchases.
Easter is right around the corner! With spring and Easter being around the same time, this season of the year seems to always be exploding with new life and fun! The bright colors, flowers, and warm sunshine make me want to dive down into the world of colorful projects. Whether it’s a new Easter decoration or a DIY project, the possibilities are endless! You can even start to feel motivated to tackle some spring clearing!
If you’re looking for exciting Easter-themed activities to do with your kids or the young ones in your family, there are plenty of fun crafts to choose from. One fun one is creating Easter Bunny Pots that can hold fresh spring flowers. Your kids will love this creative and engaging activity, and you’ll have a beautiful decoration to add to your home in time for Easter.
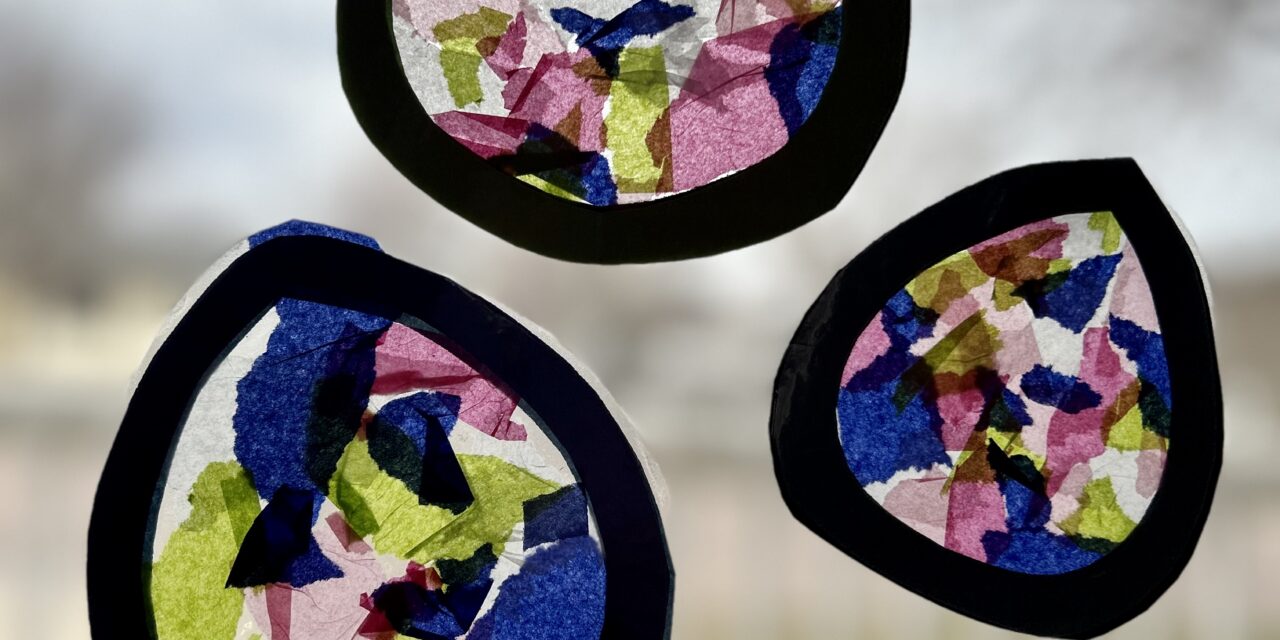
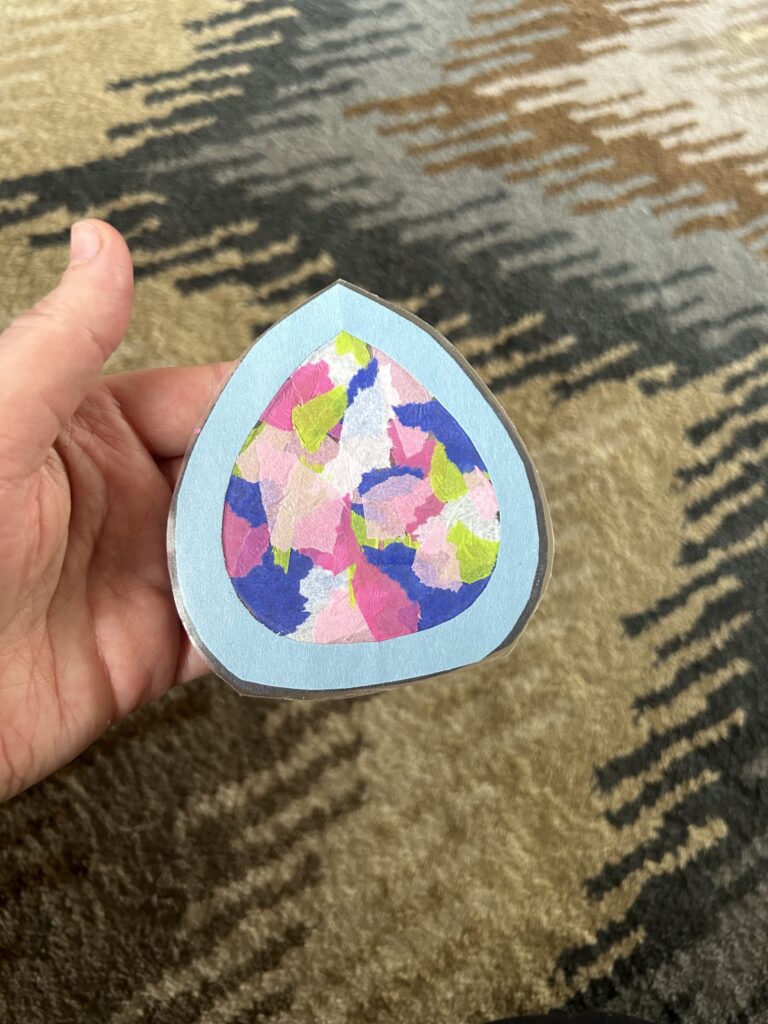
Below, we teach you how to make stained glass Easter eggs! This project is perfect for everyone. Older children will love creating their own designs and taking the time to be careful with color placement, while younger children will be excited because it’s a project they can do independently with minimal help!
Make a variety of sizes of Easter Eggs for a festive window! The same how-to applies to whatever shape you want to make. For Easter, other fun shapes for this project would be a Stained Glass Bunny, Cross, or Easter Basket outline.
Stained Glass Easter Egg Craft
What You Need:
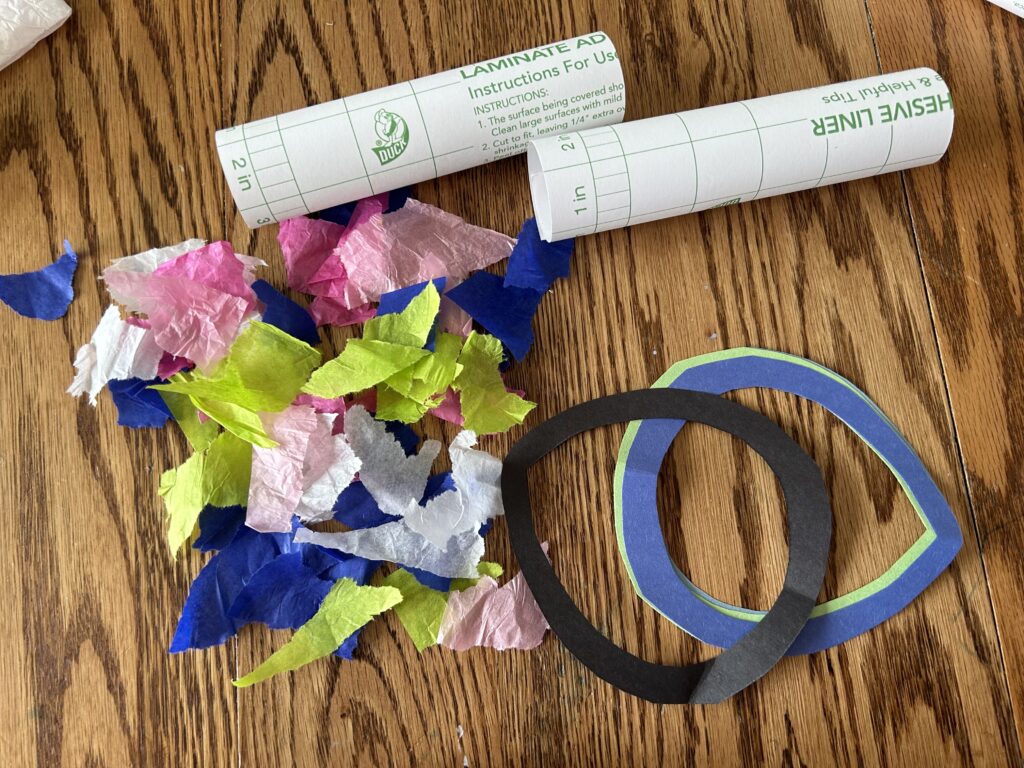
- Tissue Paper (Think colorful for Easter! We love this pack of colors)
- Contact Paper (Like this one!)
- Colored Paper (Use any kind you like)

How to Make a Stained Glass Easter Egg:
- Tear or cut different colored tissue paper into small pieces
- With the colored paper, take two pieces together and cut out the shape of an easter egg.
- Fold your Easter Eggs in half (loosely so the crease isn’t too aggressive) and cut out the middle, leaving just the outline.
- You want your Easter egg outlines to match as much as possible.
- Cut your contact paper to be slightly larger than your egg outlines.
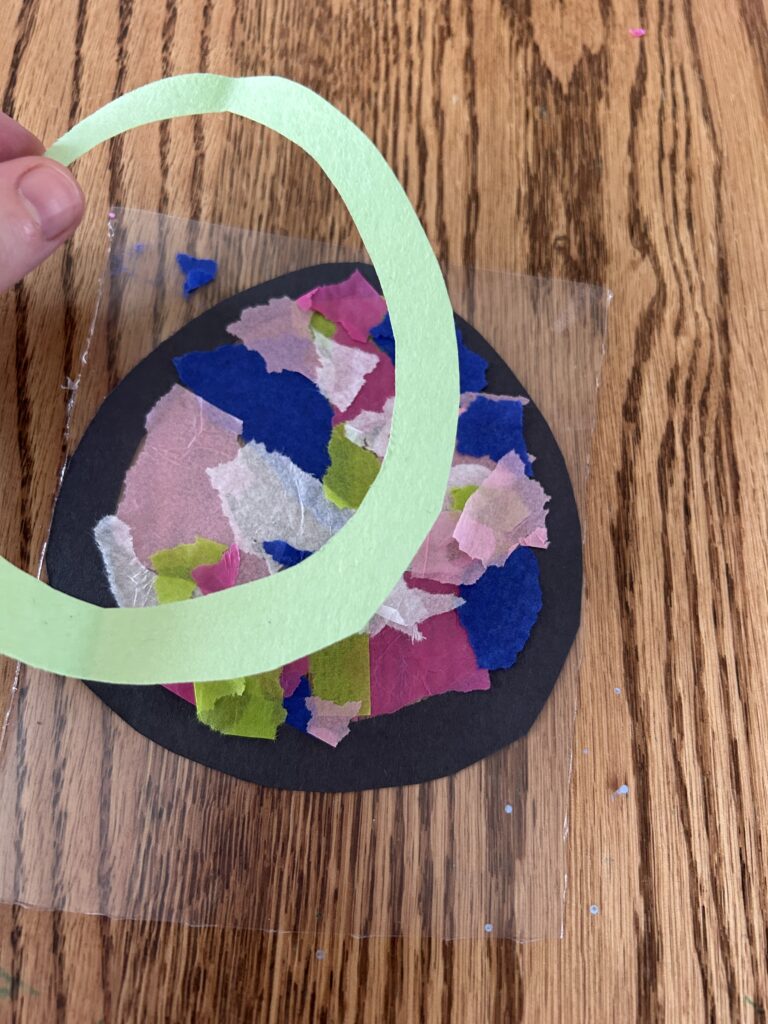
- Place one outline down flat onto the sticky side of the contact paper.
- Here comes the super fun part! Stick the bits of tissue paper down onto the sticky contact paper. Make sure to fill in the whole Easter Egg!
- Make sure that no tissue paper is covering the outline. (If it does, it will make the contact paper not stick together once you cut.) If it is, simply tear it away.
- Place the second outline over the first, matching up as much as you can.
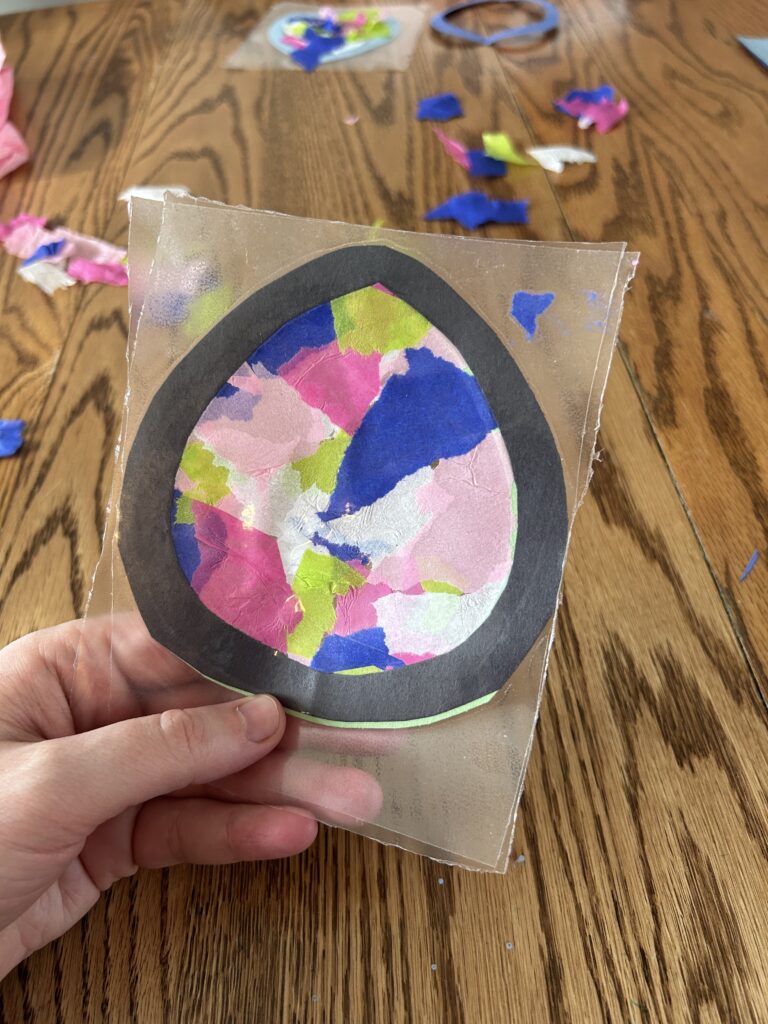
- Lay the second piece of contact paper over the egg. Press down to seal.
- Cut out your stained glass Easter egg! Make sure to leave a small amount of clear contact paper as an edge. If you cut into the normal paper, it will no longer be sealed on that cut.
- Hang in your window for a beautiful stained glass Easter Egg!
Happy Easter
We hope you have a great time making this craft and that it makes your home (or classroom) a bit more ready to celebrate Easter! Speaking of celebrating Easter, did you know that the ‘hood Magazine has a great local Calendar? Check it out to see a full list of fun Easter events in the Sioux Falls Area!
Have a very HOpey Easter!


