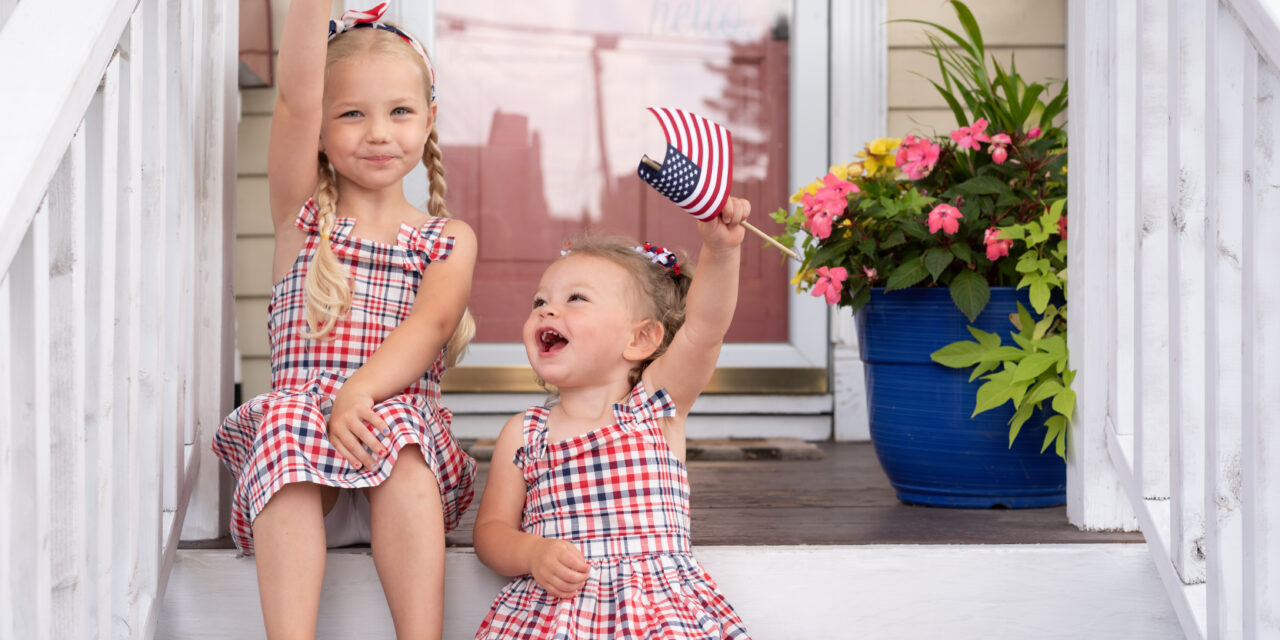
The 4th of July is a time for celebration, fireworks, and family fun. If you’re looking for a creative and engaging activity for your kids, making 4th of July wands is the perfect solution. These festive wands are not only a delightful craft project but also a wonderful way for children to show their patriotic spirit. Here’s a step-by-step guide to creating these vibrant and fun-filled wands.
Materials Needed
To get started, gather the following materials:
- Wooden dowels or sturdy sticks (about 12 inches long)
- Red, white, and blue ribbons (various widths)
- Star-shaped foam stickers or felt
- Hot glue gun (for adult use) or strong craft glue
- Scissors
- Glitter (optional)
- Decorative tape (optional)
- Small bells (optional)
Step-by-Step Instructions
- Prepare the Dowels Start by preparing your wooden dowels. If desired, you can paint them in patriotic colors (red, white, or blue) or wrap them with decorative tape. Let the paint dry completely before proceeding to the next step.
- Cut the Ribbons Cut the ribbons into various lengths, typically between 12 to 24 inches. Using different lengths and widths will add texture and movement to the wands. You can use a mix of solid colors and patterned ribbons for extra flair.
- Attach the Ribbons Gather all the ribbons at one end, aligning them together. Using a hot glue gun (with adult supervision) or strong craft glue, attach the gathered end of the ribbons to the top of the dowel. Hold the ribbons in place until the glue sets. If you’re using a hot glue gun, be cautious and ensure the kids are at a safe distance during this step.
- Add Stars and Decorations Once the ribbons are securely attached, it’s time to add some star-spangled decorations. Stick the star-shaped foam stickers or felt stars around the top of the dowel, covering the glued area. You can also use glitter to add some sparkle to the wands. If you opt for glitter, apply a thin layer of glue and sprinkle the glitter over it. Allow it to dry thoroughly.
- Optional: Add Bells For an extra touch of fun, you can attach small bells to the ribbons. The jingling sound will add to the festive atmosphere. Simply tie the bells to the ends of some of the ribbons or use a small dab of glue to secure them.
- Finishing Touches Ensure all decorations are securely attached and check for any loose parts. Trim any excess ribbon if necessary, and your 4th of July wands are ready to dazzle!
Tips for a Successful Crafting Session
- Supervision: Always supervise young children, especially when using hot glue guns or scissors.
- Creativity: Encourage kids to express their creativity by mixing different ribbon styles, colors, and decorations.
- Preparation: Pre-cutting ribbons and preparing materials in advance can help the crafting session go smoothly, especially with younger children.
Enjoy the Celebration
Once your wands are complete, the kids will be thrilled to wave them during the 4th of July parade, at family gatherings, or while watching fireworks. These wands are not only a great way to keep kids entertained but also a beautiful keepsake to remember the celebration.
Making 4th of July wands is a simple and enjoyable craft that adds a personalized touch to the holiday festivities. Happy crafting and happy Independence Day!


